Oracle Applications R12 Installation.
Taking advantage of virtualization, the installation is performed on VirtualBox guest system.
Set up of Guest OS on VirtualBox is explained on one of my previous posts here and so is not repeated here.
Software: Oracle E-Business Suite Release 12.1.1

Host Machine: Centos 5.5 x86-64, 8GB RAM, Intel i5 Quad-Core.

VirtualBox Guest: RHEL 5.5 x86-64, 4 GB RAM, Single CPU
1. Installer downloads
Installer files are available for download from Oracle E-delivery. Search for “E-Business Suite” for “Linux x86_64”. Select “Oracle E-Business Suite Release 12.1.1 Media Pack for Linux x86-64-bit”.
For basic installation, approximately 47G of files need to be downloaded. Download the below Rapid Install files into the Host system.
.     Start Here (4 Parts)

.     RDBMS Disk 1 (3 Parts)

.     Databases Disk 1 to 9 (Each 3 Parts)

.     Tools Disk 1 (1 Part)

.     APPL_TOP Disk 1 & 2 (Each 3 Parts)
2. Unzip all downloaded files.
The plan is to set up a staging area in the host system and then provide it to virtualbox guests as shared drives. This has the advantage of not transferring the downloaded files into guest system (time consuming) and the ability to use the same staging area for installing on multiple guests.
Create a staging directory, say stage12 and move all the downloaded files into it. This is where all the files will be unzipped. The installation will also be kicked off from this staging area.
Using the below for loop, unzip all the files in stage12.
for i in *zip

do

unzip $i

done
This will create the five directories startCD, oraApps, oraDB, oraAS, oraAppDB and many subdirectories beneath it.
Note: If DVDs are used for installation, the perl script “adautostg.pl” under “Start Here/Disk1/rapidwiz” can well be used to set up the stage directory and stage the components for installation.
3. Configuring network.
A) DNS:
The name of the guest system is “atl1.ontarioinc.com” (hostname.domainname). This name has to be configured in DNS for forward & reverse lookups so that it can be accessed from host system and other guest systems if need be.
The post here explains the steps to configure the basic DNS server. I’m using my host system (Centos) as DNS server and the service always starts up when the system boots. So all I need to do is to add the details of the guest alt1.ontarioinc.com in the configuration files on the host and then update /etc/resolv.conf in the guest & host.
On DNS server (my host centos system):
Update file /etc/named.conf, add the below
zone "ontarioinc.com" IN {

type master;

file "ontarioinc.com.zone";

allow-update { none; };

};
Add the zone file to /var/named
vi /var/named/ontarioinc.com.zone
$TTL    86400

@               IN SOA  localhost root.localhost (

42              ; serial (d. adams)

3H              ; refresh

15M             ; retry

1W              ; expiry

1D )            ; minimum

IN NS           localhost

bnair           IN A    192.168.2.222

atl1            IN A    192.168.2.252
For reverse lookup, update the file /var/named/2.168.192.in-addr.arpa, add the below values towards the bottom.
252 IN PTR atl1.ontarioninc.com.
In the guest system, update resolv.conf file to refer the dns server (host) for names resolution.
[root@atl1 ~]# more /etc/resolv.conf

; generated by /sbin/dhclient-script

search ontarioinc.com

nameserver 192.168.2.222

options attempts:5

options timeout:15
Test:
[bnair@bnair ~]$ nslookup atl1.ontarioinc.com

Server: 192.168.2.222

Address: 192.168.2.222#53

Name: atl1.ontarioinc.com

Address: 192.168.2.252
[bnair@bnair ~]$ nslookup 192.168.2.252

Server: 192.168.2.222

Address: 192.168.2.222#53

252.2.168.192.in-addr.arpa name = atl1.ontarioninc.com.
Ensure that /etc/resolv.conf in the guest and host have the below values
options attempts:5

options timeout:15
B) /etc/hosts in guest:
Ensure the details are available in the guest /etc/hosts file
127.0.0.1 localhost.localdomain localhost

192.168.2.252 atl1.ontarioinc.com atl1
C) /etc/sysconfig/network in guest:
Ensure that /etc/sysconfig/network file has the below entry
HOSTNAME=atl1.ontarioinc.com
Also, see to it that the default network file /etc/sysconfig/networking/profiles/default/network is removed [if it exists].
4. Configuring Guest OS
There are a series of checks that need to be completed before kicking off the installation. For 64 bit OS, the Metalink note is 416305.1
Listed below are those checks:
A) Kernel > 2.6.18-53.1.4.EL5. Mine is 2.6.32-100.0.19.EL5
B) Install OS Packages (guest)
Check if the listed packages are installed in the guest system.
To check, do 'rpm –qa | grep package_name   OR yum list package*.

For ex:- rpm -qa  | grep glibc    OR  yum list glibc*
gcc-4.1.2-14.el5.x86_64

gcc-c++-4.1.2-14.el5.x86_64

glibc-2.5-18.i686 (32-bit)

glibc-2.5-18.x86_64

glibc-common-2.5-18.x86_64

glibc-devel-2.5-18.i386 (32-bit)

glibc-devel-2.5-18.x86_64

libgcc-4.1.2-14.el5.i386

libgcc-4.1.2-14.el5.x86_64

libstdc++-devel-4.1.2-14.el5.i386

libstdc++-devel-4.1.2-14.el5.x86_64

libstdc++-4.1.2-14.el5.i386

libstdc++-4.1.2-14.el5.x86_64

make-3.81-1.1.x86_64

gdbm-1.8.0-26.2.1.i386

gdbm-1.8.0-26.2.1.x86_64

libXp-1.0.0-8.1.el5.i386

libXp-1.0.0-8.1.el5.x86_64

libaio-0.3.106-3.2.i386

libaio-0.3.106-3.2.x86_64

libgomp-4.1.2-14.el5.x86_64

sysstat-7.0.0-3.el5.x86_64

util-linux-2.13-0.45.el5.x86_64

compat-libstdc++-296-2.96-138.i386

compat-libstdc++-33-3.2.3-61.i386
if not available, install it from the distribution media or any of the free repositories available. Download the rpm file and then as root
$ rpm -Uvh <packagename>
Note: I normally use base and rpmforge repositories and use yum to update packages.
Install the below from
http://oss.oracle.com/projects/compat-oracle/files/Enterprise_Linux/
openmotif21-2.1.30-11.EL5.i386.rpm
xorg-x11-libs-compat-6.8.2-1.EL.33.0.1.i386.rpm
Note: Open motif has to be 2.1.3. Even higher versions such as 2.2.3-10.RHEL4.5 is not supported.
C) Kernel Parameter settings on guest
Ensure /etc/sysctl.conf has the below settings. If the current value of any of the below are already greater than the value given here, keep it like that.
Parameter & Value

net.ipv4.ip_forward = 0

net.ipv4.conf.default.rp_filter = 1

net.ipv4.conf.default.accept_source_route = 0

kernel.sysrq = 0

kernel.core_uses_pid = 1

net.ipv4.tcp_syncookies = 1

kernel.msgmnb = 65536

kernel.msgmax = 65536

kernel.msgmni = 2878

kernel.shmmax = 68719476736
fs.aio-max-nr = 1048576

fs.file-max = 6815744

kernel.shmall = 2097152

kernel.shmmni = 4096

# semaphores: semmsl, semmns, semopm, semmni

kernel.sem = 250 32000 100 142

net.ipv4.ip_local_port_range = 9000 65500

net.core.rmem_default=262144

net.core.rmem_max=4194304

net.core.wmem_default=262144

net.core.wmem_max=1048586
D) Create users on guest
This is done as a multi node installation, where in middle tier will be owned by user “applmgr” and database tier by user “oracle”. The installation will be kicked off as root. Additional criteria for multi-node installation is that both owner should have the same primary group.
$ groupadd dba

$ useradd -g dba -G dba,oinstall applmgr

$ useradd -g dba -G dba,oinstall oracle
E) Modify the open file descriptors on guest
oracle hard nofile 65535

oracle soft nofile 4096

oracle hard nproc  16384

oracle soft nproc  2047
applmgr hard nofile 65535

applmgr soft nofile 4096

applmgr hard nproc  16384

applmgr soft nproc  2047
E) Install missing library Patch for Oracle HTTP Server in RHEL 5
Need to download and apply the patch 6078836 from Metalink to resolve the issue with missing library file “libdb.so.2”. This patch is absolutely necessary. The patch is same for 32 bit and 64 bit Linux.
All that needs to be done is to download the patch. It contains the missing library file. Copy that to /usr/lib
$ unzip p6078836_101330_Linuxx86.zip

$ cd 6078836

$ mv /usr/lib/libdb.so.2 /usr/lib/libdb.so.2.6078836

(if libdb.so.2 exist already in /usr/lib)

$ cp libdb.so.2 /usr/lib
5. Storage space allocation (Guest)
According to documentation, the storage space needed for apps installation with fresh vanilla database is around 71GB and with VIS demo database is around 165GB.
I had to allocate approximately 225G to get through the installation without any warnings.
The disk is formatted as ext3 and mounted as /applmnt
6. Oracle Apps R12 Installation kick-off
Even though guest system is powerful, I would not recommend starting up the installer inside the guest system as installation is a long drawn out process and personal experience shows that the desktop process will hang or guest will crash.
So I used “xming” free x server from my windows laptop to access the Host centos system which was started up in command mode.
$ set DISPLAY=:0.0

$ set TMP=/stage12

$ set TMPDIR=/stage12

$ cd /stage12/startCD/Disk1/rapidwiz

$ ./rapidwiz


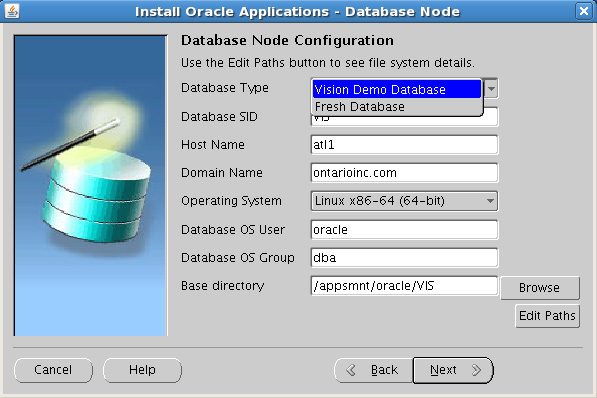
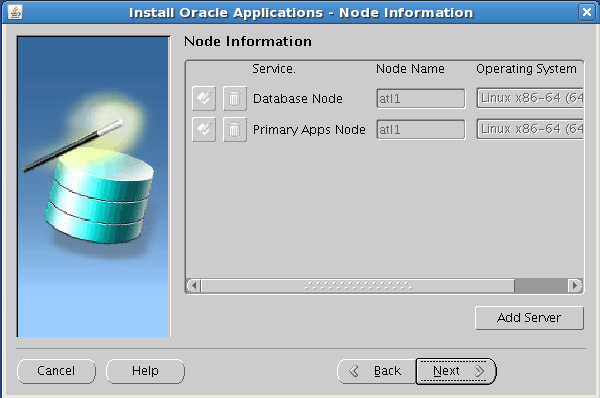
Details of Oracle Database Installation

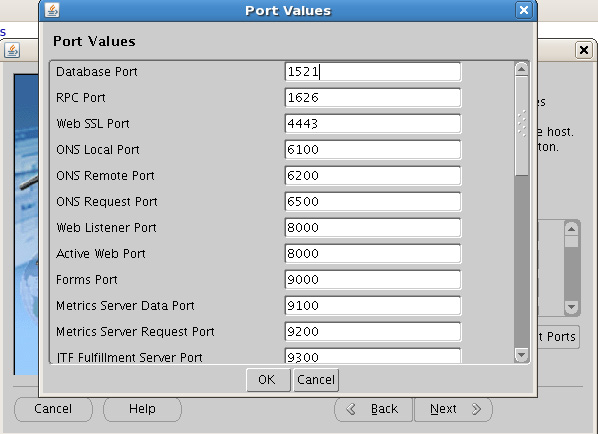
For the next slide where Apps install directories are mentioned, the below values were provided.


Host Name : atl1

Domain Name: ontarioinc.com

Operating System: Linux x86-64

Apps OS User: applmgr

Apps OS Group: dba

Base Directory: /appsmnt/applmgr/VIS

Instance Directory: /appsmnt/local/VIS/inst


The installation took roughly 3 hours to finish. It's basically unzipping infinite number of files. Once the installation finish successfully, the login would be accessible as

http://hostname.domainname:8000/OA_HTML/AppsLogin

Enter user as "sysman" and the password ("sysman" itself for first time logins)
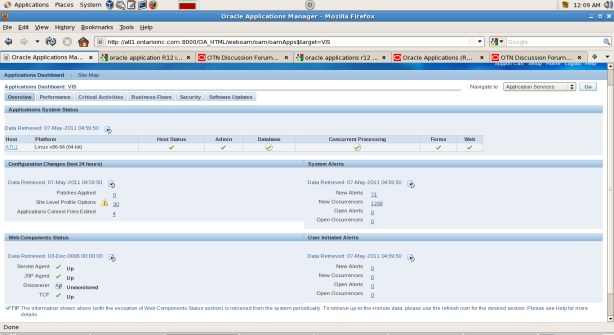
Below given is the Oracle Applications Manager page

7.Post Installation Tasks
A) Stop Apps Server
$ su - applmgr

$ ./$APPS_TOP/APPS.env

$ cd $INST_TOP/admin/scripts

$ ./adstpall.sh

Give apps and password for apps
B) Link to Motif library in Oracle Application Server 10.1.2 (on Oracle Linux 5 and RHEL 5 only)
Perform the following command (as root on your system) to update a required link to a Motif library prior to relinking or patching the 10.1.2 Application Server Oracle Home
As root
# unlink /usr/lib/libXtst.so.6

# ln -s /usr/X11R6/lib/libXtst.so.6.1 /usr/lib/libXtst.so.6
C) Relink Advanced Supply Chain Planning executables (for SLES 10 and Oracle Linux/RHEL 5.4 or higher only)
Replace the following line under the Linux section of the $AD_TOP/bin/adrelinknew.sh
$ cd $AD_TOP/bin

$ vi adrelinknew.sh
Under linux in the file, replace
CPP_LDFLAGS=' -L$(ORACLE_HOME)/lib -L$(ORACLE_HOME)/lib/stubs -lclntsh'

with

CPP_LDFLAGS=' -L$(ORACLE_HOME)/lib -L$(ORACLE_HOME)/lib/stubs -lclntsh -Wl,--noinhibit-exec'
8.Apply patch 10364346
Immediately after installation of R 12.1.1.0.0, configuring Metalink credentials will throw the below error:
"Unable to connect to Metalink. Please enter a valid Metalink userid and password. Please also check if the web Proxy Setup information is correct."
More details on the error available with OAM log files @

$INST_TOP/logs/appl/rgf/oam  And @ $INST_TOP/logs/appl/oam
The patch 10.364346 needs to be applied to resolve the issue. Once it's applied, enter the Metalink email id for userid & email id and then the password, bingo! Metalink credentials are accepted. The patching process will be explained in the next post.


